Hi,
On this topic we will see how to configure a fresh installed Windows allowing multiple operators to run Smode Station.
As a prerequiestes you can install Windows 10 with the following instructions
First, setup some Windows Explorer display setting, for this run the Windows Explorer by tipping the two keyboard key at the same time: [Windows] + [E].
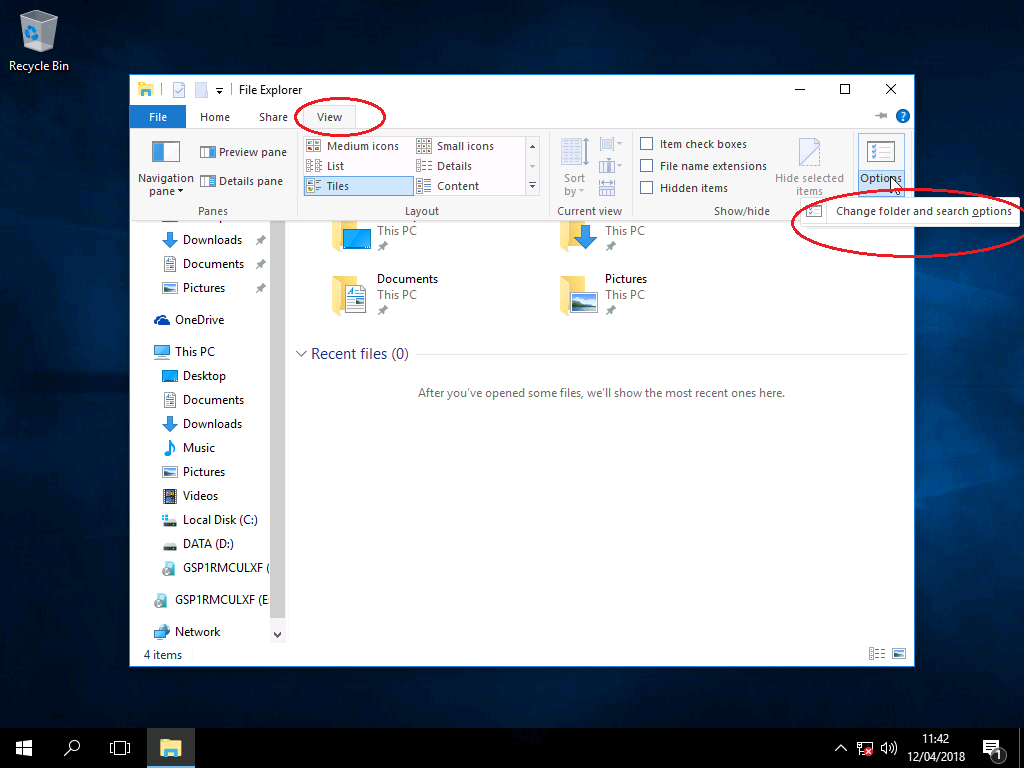
Then on the View tab click on Options button and click on "Change folder and search options" popup menu.
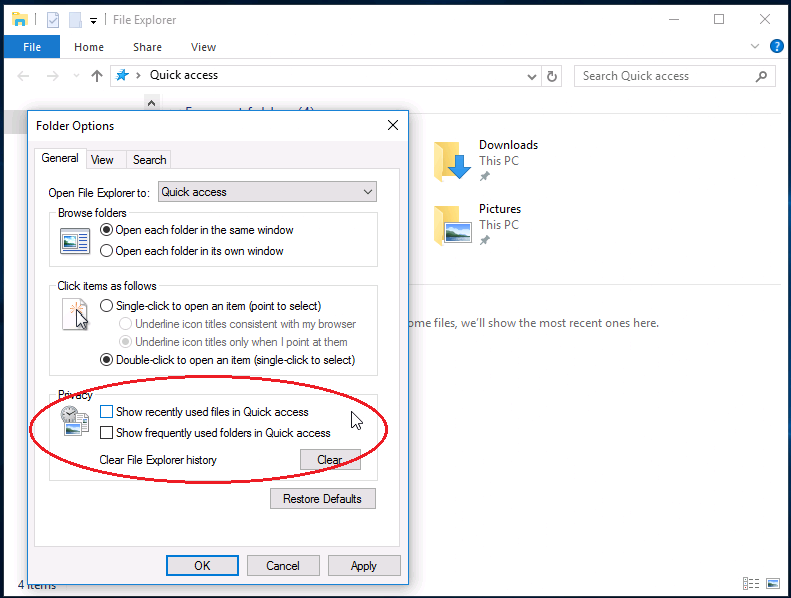
In privacy group, uncheck quick access options
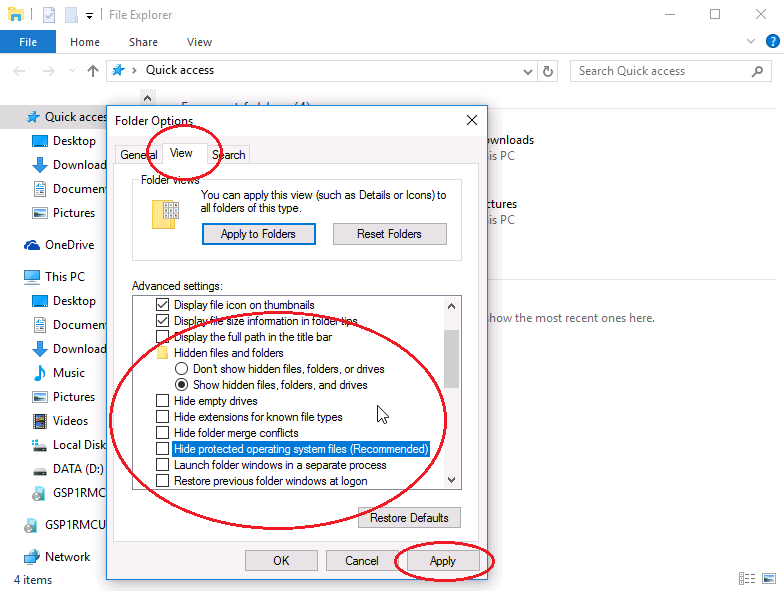
In the View tab, avoid to hide as maximum as information as possible
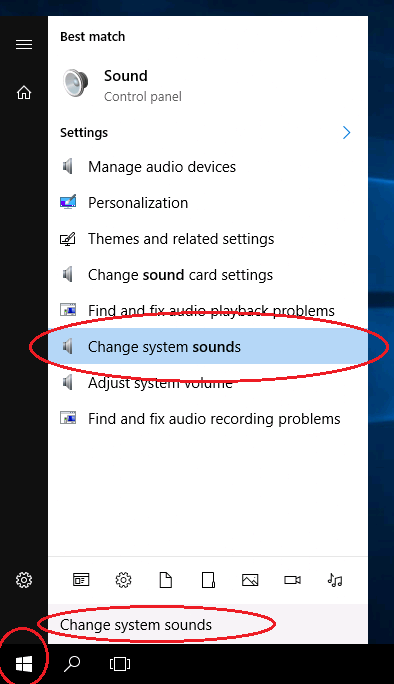
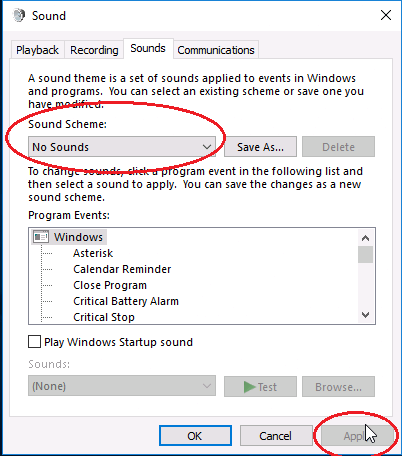
To avoid nasty system sound be heard during a show, go to the windows menu and type "change system sounds" and click on it.
Select the "No sounds" in the sound scheme and clik on the apply button. Then close the windows
To avoid screen goes black durring a show,
click on the Windows menu and type "Power Options" then click on it.
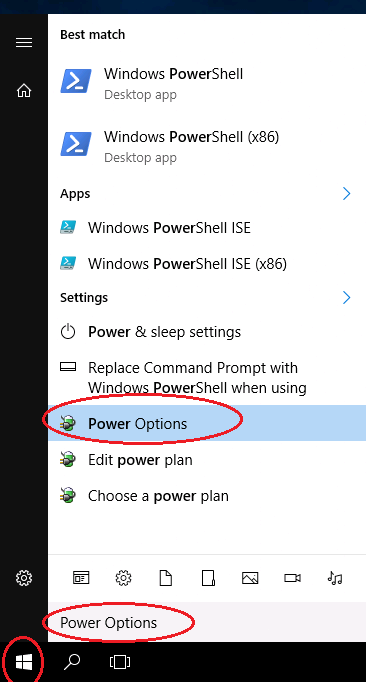
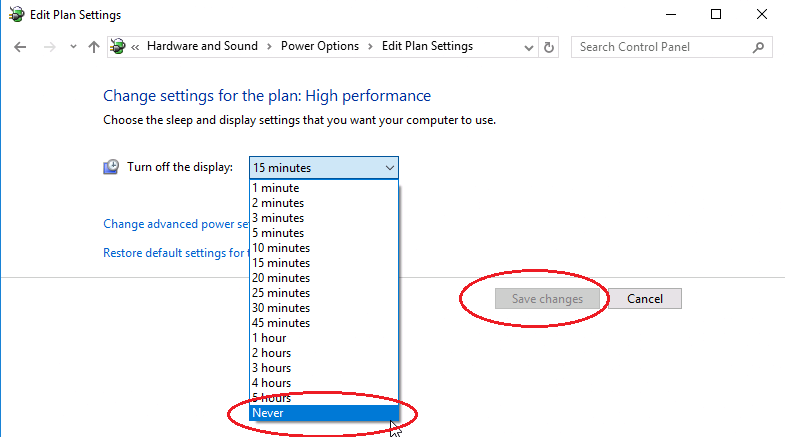
Show additionnal plans, and select "High Performance"
Then change the plan settings, and select "Never" to Turn off the display, then click on save changes button.
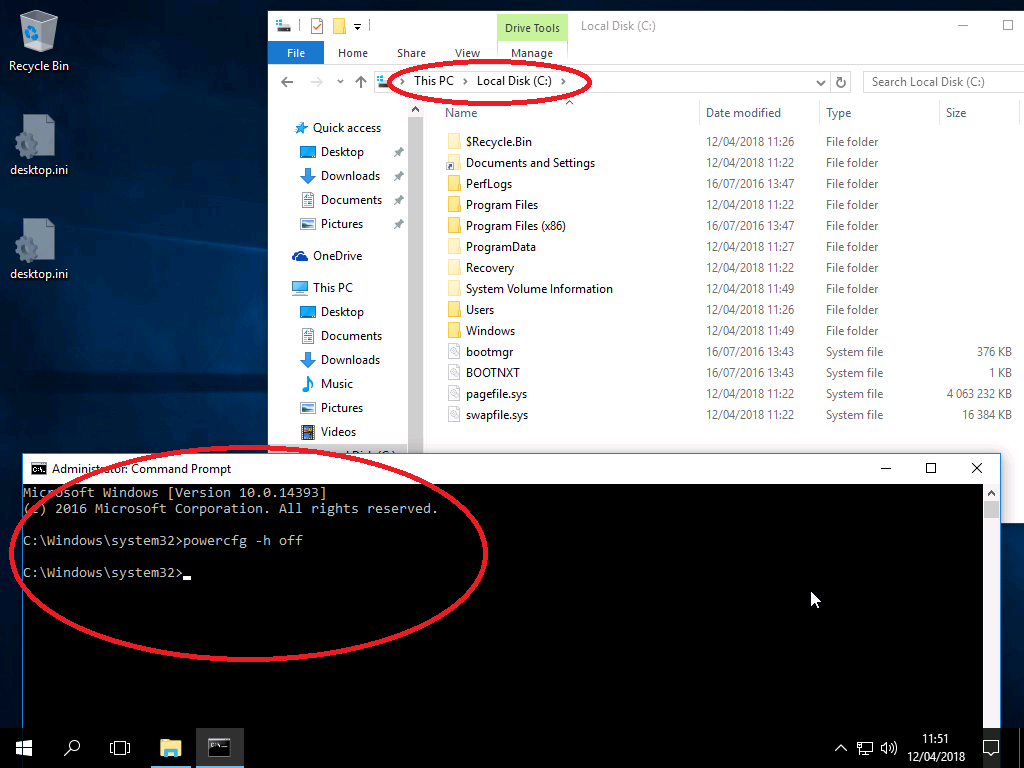
Because your Smode Station is not mandatory a laptop, you can display the usage of the very uge hiberfil.sys by typing a special command in the command prompt.
For this click on the windows menu and type "cmd"
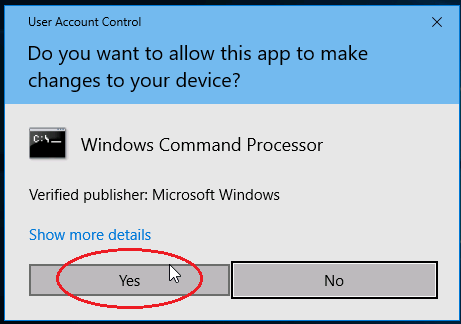
right click on the Command Prompt to run it as an Administrator.

Accept the User Account Control to made changes.
then type "powercfg -h off"
This will delete the hiberfil.sys.
To avoid OS prompt to launch system restoration at boot when an unexpected reboot crash happen (useful when computer are only remotely accessible without physical keyboard, also type the following command:
bcdedit /set {current} bootstatuspolicy ignoreallfailures
You can now close the console.
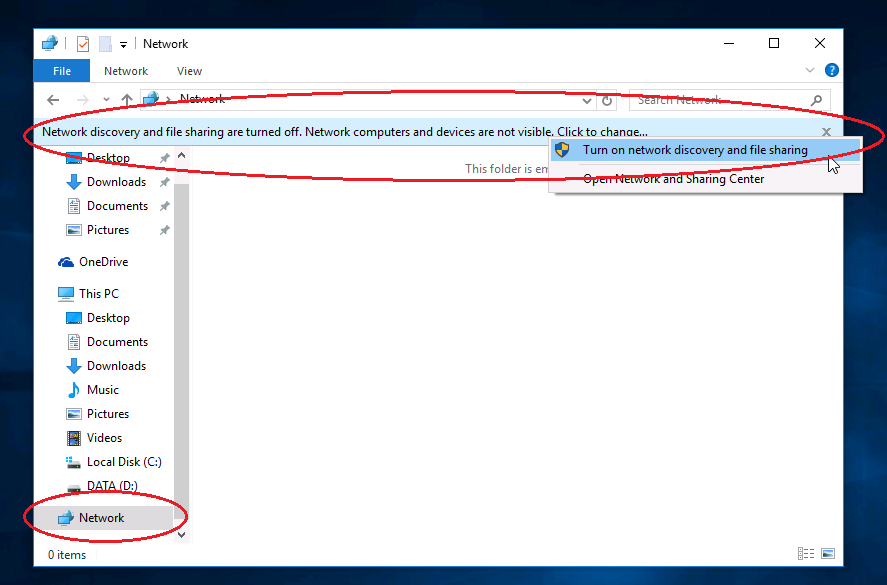
To allow easy network file sharing cross Windows file system,
On the Windows Explorer click on the network item
then click on "Turn on network discovery and file sharing"
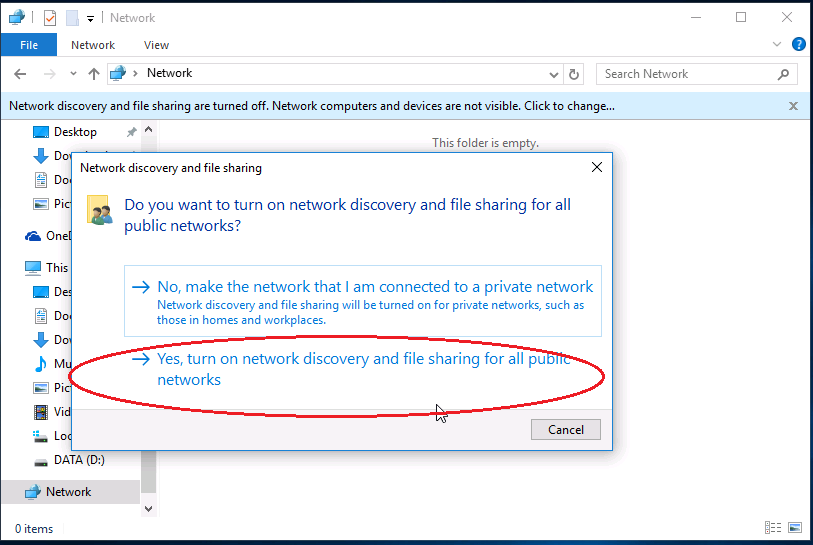
Turn on discovery on public network.
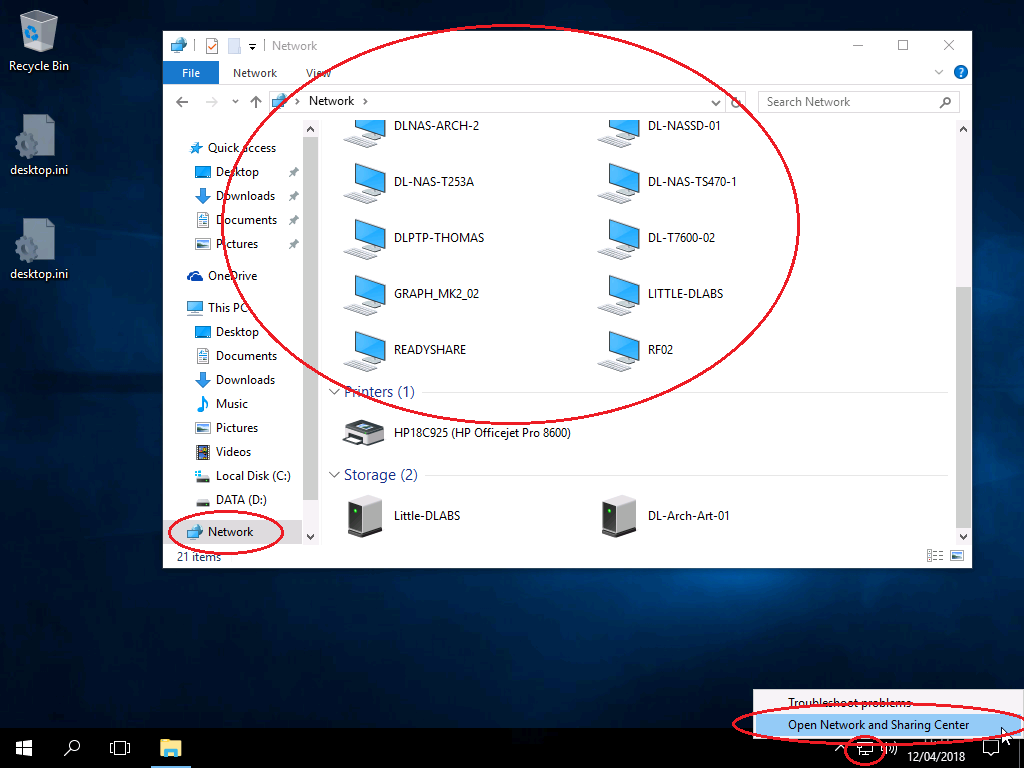
Nearest computer should be visible.
Right click on the network icon in the system tray and select "Open Network and sharing center"
Change advanced sharing setting
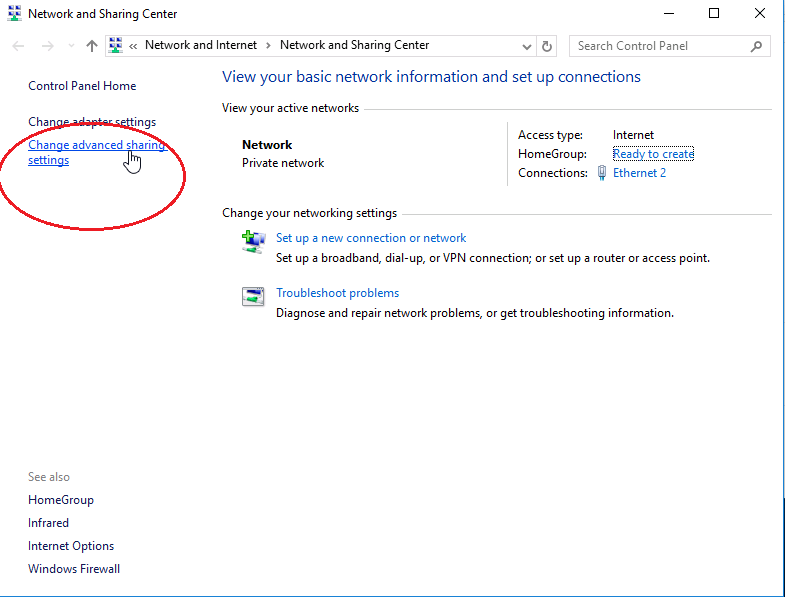
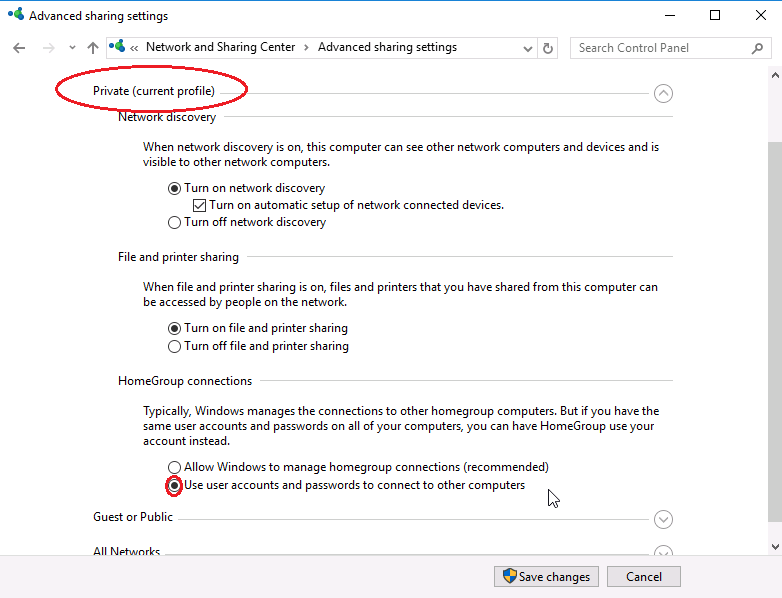
in the Private profile, avoid using homegroup by selecting
"use user accounts and passwords to connect to others computers"
In All Networks profile
Select "Turn off password protected sharing" to allow user without password to connect to shared folder, then save your settings:

Then sign out to apply changes

To allow the computer be power on lan via special network packet, you must enable it from the Device Manager:
First type Device Manager in the Windows Menu:
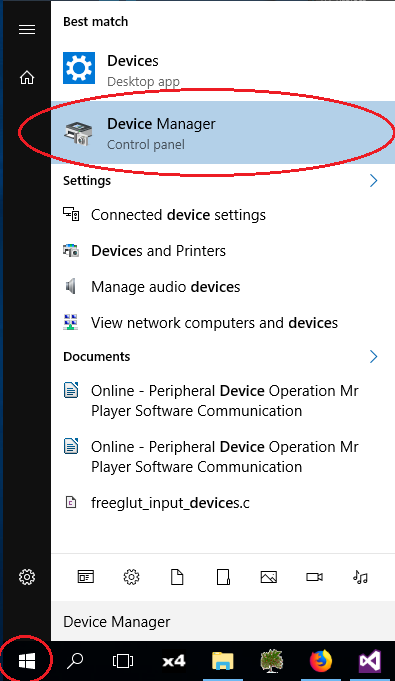
Then unroll Network Adapters tree Item and modify properties of each concerned network adapter:
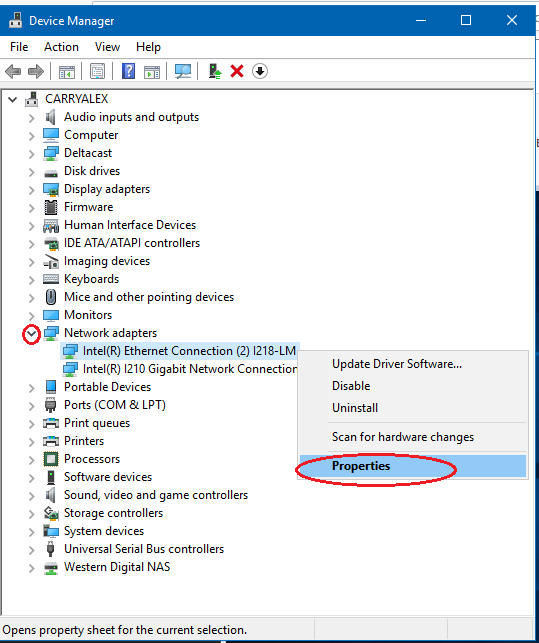
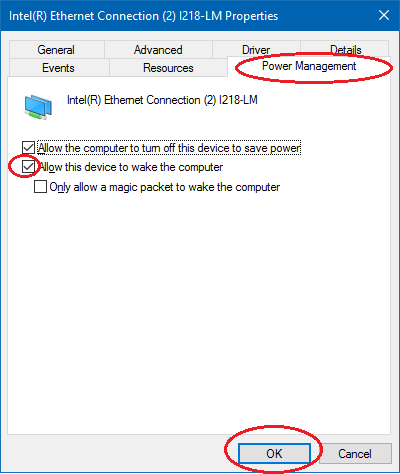
Then go in the power manager tab and check "Allow this device to wake the computer":
To collect last Windows features and security fixes, when needed only, launch Windows update.
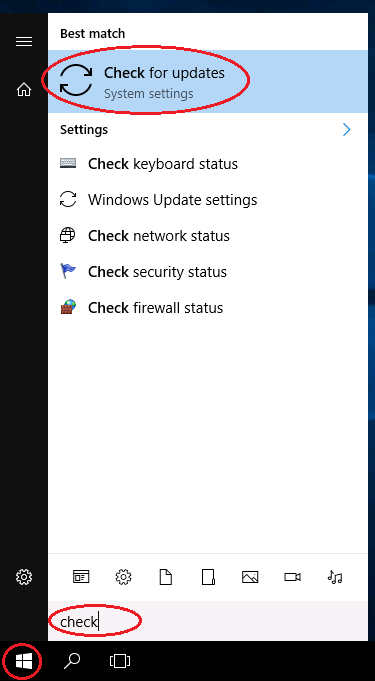
Do this by clicking on the Windows menu and type "Check for Updates" and click on it.
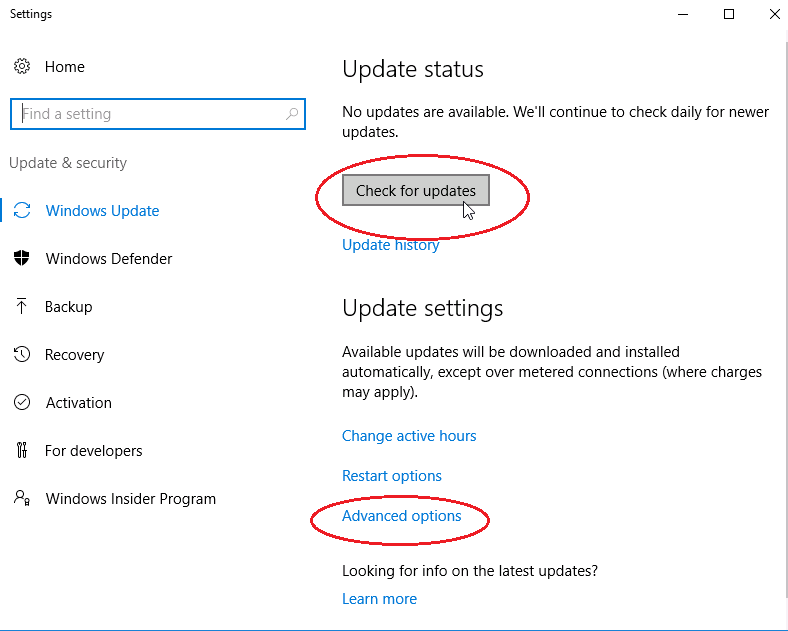
Click on the "Check for Updates" buttons, and select Advanced option.
In advanced options select "How updates are delivered"
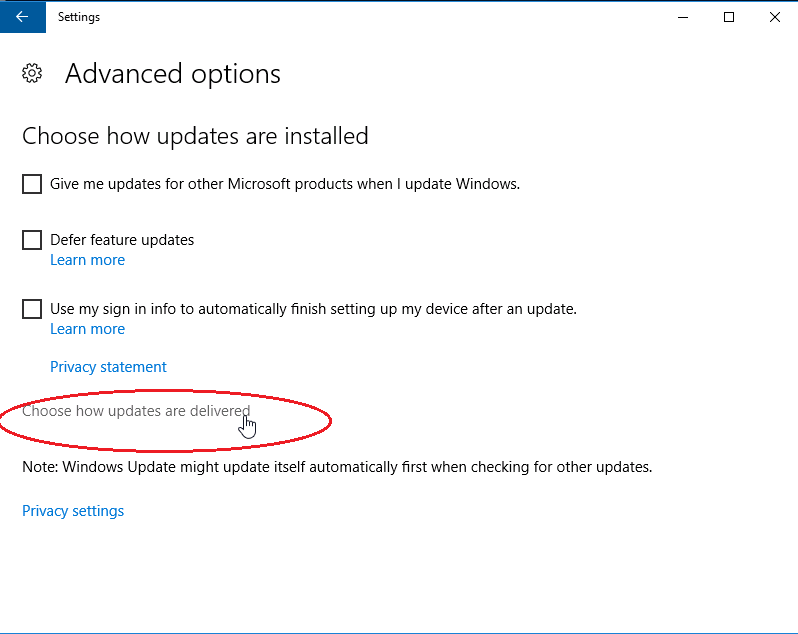
Then turn it off to avoid network
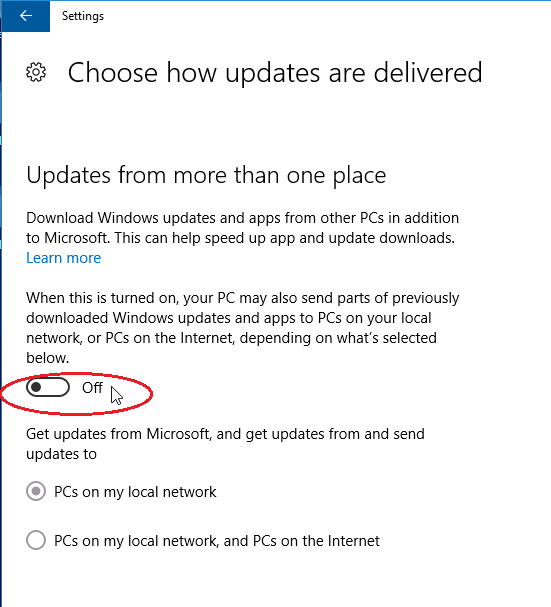
Updates can takes several hours to run, several computer restarting should be requiered before beeing complete.
To configure installed Windows component type click on the Windows menu and type ''Programs and Features", then click on it.
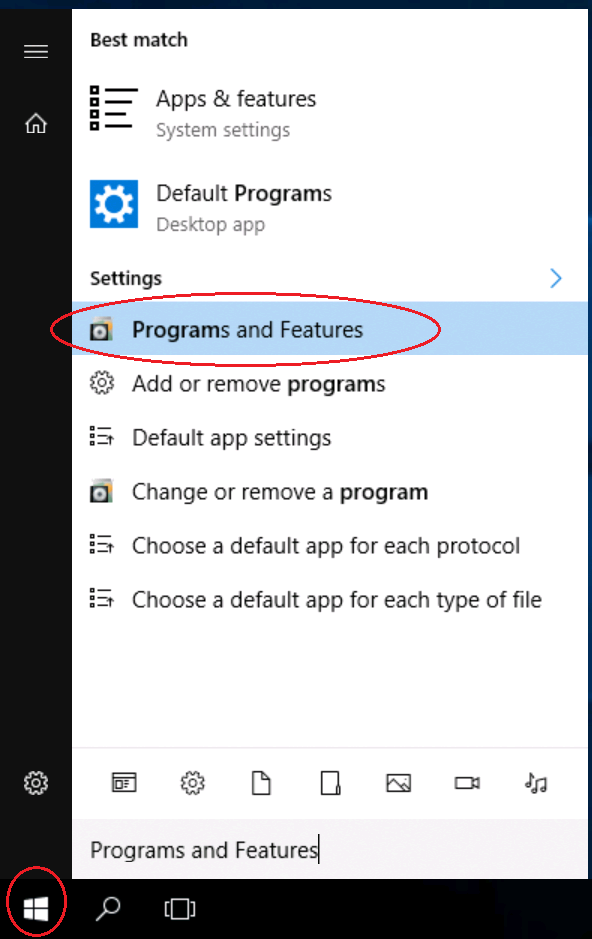
Right click on Microsoft One drive and uninstall it. Then click on "Turns Windows features on and off"
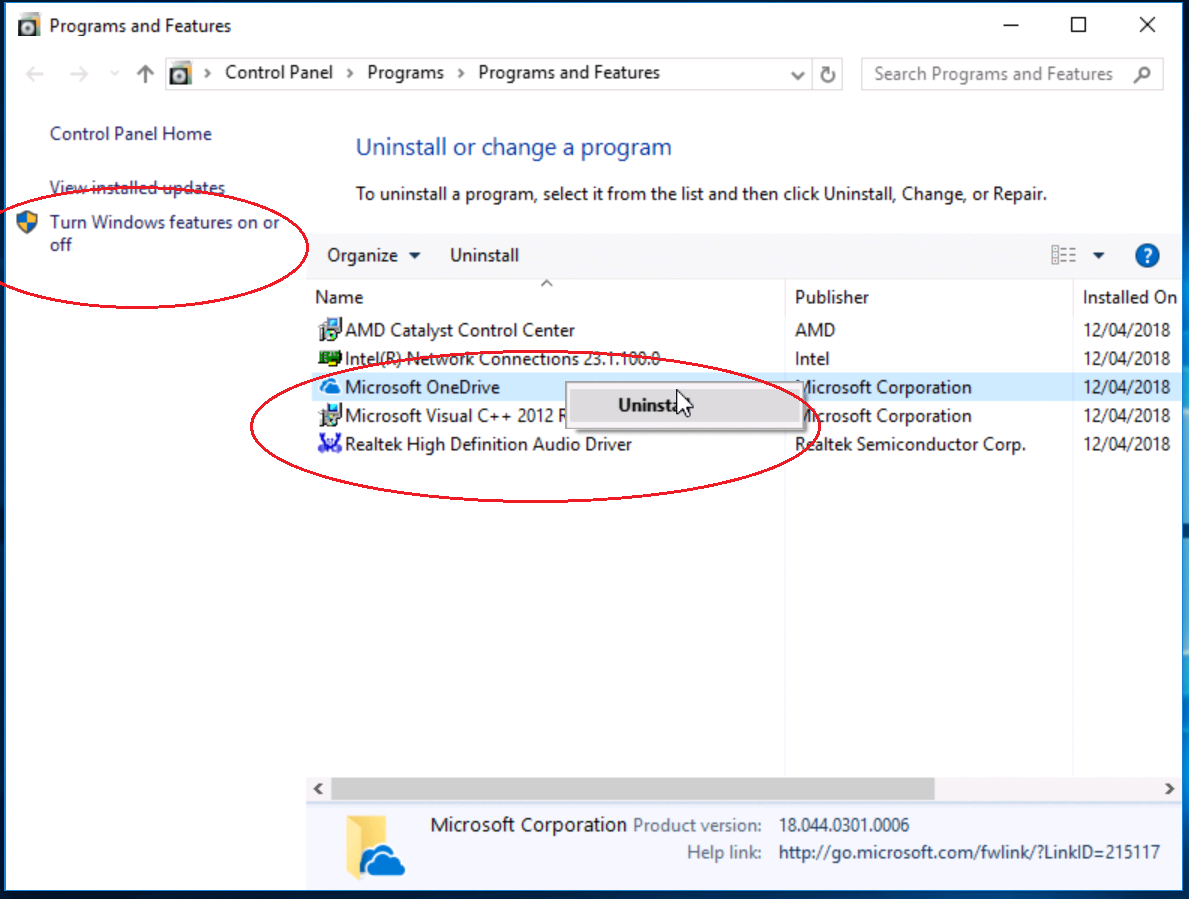
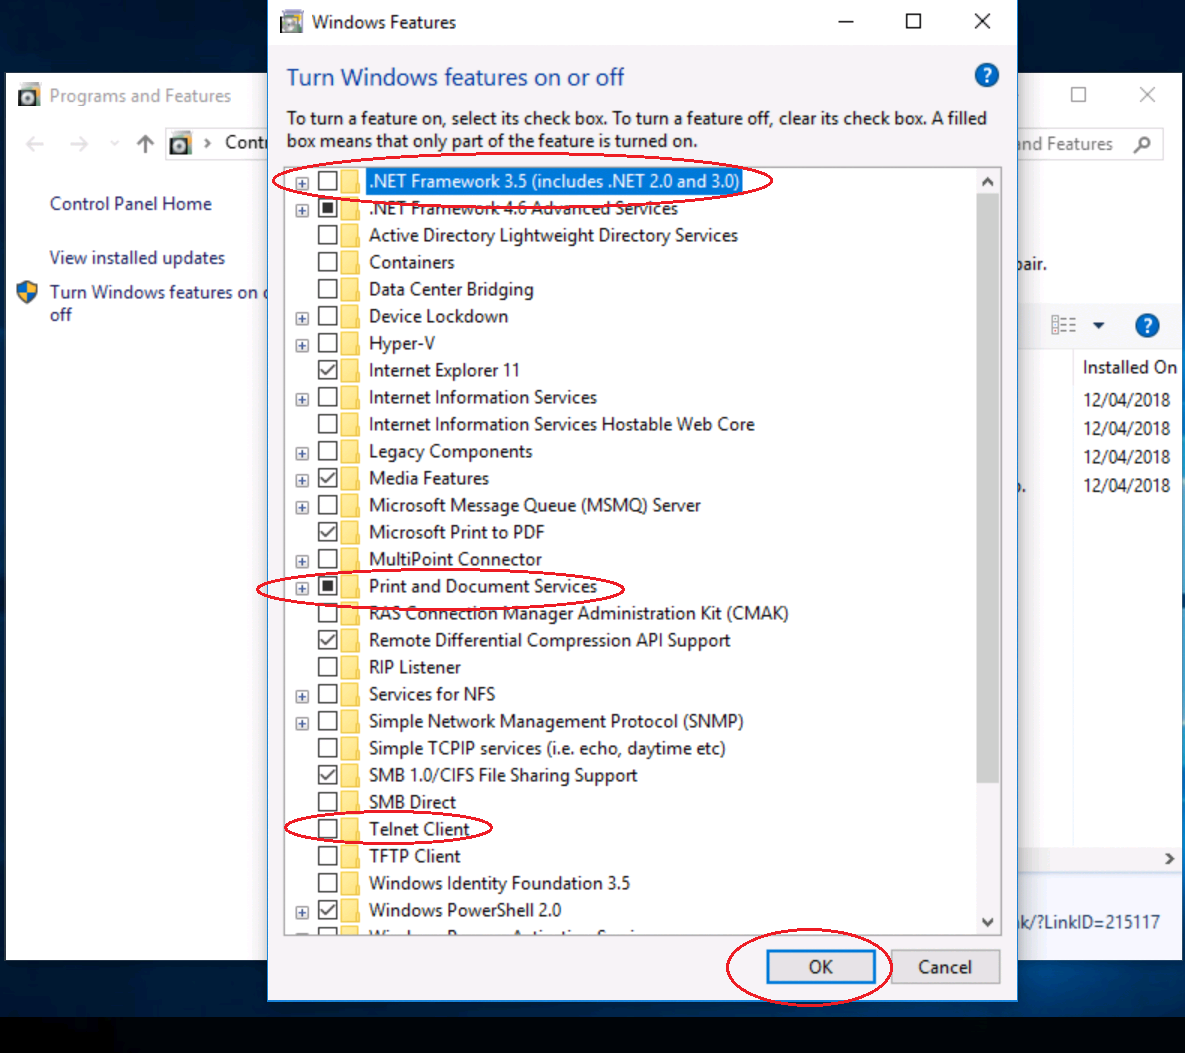
On this panel
Check ".NET Framework 3.5" and "Telnet Client"
Then uncheck "Print and Document Services"
- You should also adjust visual performance as explaned on this ticket:
- disable several services:
- and install custom localized font support
- if you came from a Windows 10 Pro, you can also remove extra software by using this tutorial: